


Percy Pig Cheesecake...
- Hannah Waters

- Nov 6, 2020
- 2 min read
So this week’s blog is such a simple treat a Percy Pig Cheesecake. I was asked if I could make something like this and I was definitely up for the challenge. I had so much fun making the pig cupcakes inspired by Percy pigs and I didn’t need much of an excuse to make this cheesecake. Of course I was like a big kid and my Percy pig had to make an appearance in the photographs. You just can’t beat a classic cheesecake and I’ve been doing a lot of cakes recently so it was nice to mix it up a bit.

Ingredients
· 200g digestive biscuits
· 80g butter melted
· 450ml double cream (about 100ml extra for the decoration)
· 100g icing sugar
· Vanilla flavouring
· 550g cream cheese
· Percy pigs
· Percy pig sauce (optional)
I made this cheesecake in a 8inch tin. I put the biscuits in a bowl and you want to crush them until the crumbs are fine. I couldn’t find my rolling pin so improvised using a hammer as carefully as I could. Obviously I would recommend using a rolling pin. Add the melted butter and added this to the tin. I used the back of a spoon to press it firmly down. I put this in the fridge for about 15minutes. Once the biscuit base was chilling I started to make the cheesecake mix. I started by whisking the double cream until thick and then adding the cream cheese in. This created a nice thick mix. For some sweetness I added the icing sugar and a touch of vanilla flavouring. Add this on top of the biscuit base and smooth. I used a cake smoother to make the top of the cheesecake level. Place back in the fridge to set for a few hours.


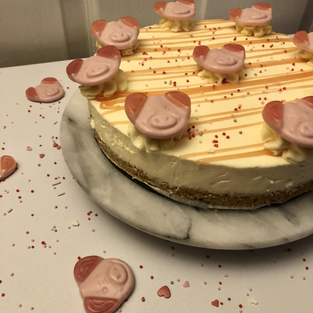
Next is the decorating, the part I love the most. With the double cream that’s left whisk this up and add some icing sugar until it can be piped. Place in a piping bag with a star nozzle. Remove the cheesecake from the tin and you are ready to decorate. I started by drizzling the sauce on first. You can drizzle the sauce in any pattern you like, the sauce complimented the cheesecake really well. I then piped the cream around the edge of the cheesecake and added some Percy pigs on top. To finish this cheesecake I added some pink sprinkles and then it was ready to be photographed. I was a big fan of how this cheesecake came out and loved getting photos of it. I had far too much fun taking videos with my pig, it certainly made me look like a big kid.
This cheesecake recipe is so simple and can be adapted to any flavour, but I loved this Percy pig twist I was asked to try. It was also a nice break from cakes, not that you can ever have enough. I hope you love this cheesecake recipe and this week’s blog. Have a lovely week.
Lots of love,
Hannah xx


Comments